
Installation · 9 min read
Wall-Mounted Handrail Installation: A Complete Guide
Learn when and how to install a wall-mounted handrail — bracket types, spacing, stud anchoring, code height requirements, and how to return the rail at each end.
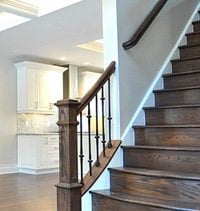
[HERO IMAGE: A clean round wood handrail mounted to a painted wall on brackets, running along a staircase with no baluster system — a simple wall-to-wall installation]
Not every stair needs a full railing system. Sometimes a wall-mounted handrail is exactly the right solution: structurally clean, code-compliant, and far less complicated than a post-and-baluster assembly. Basement stairs, secondary handrails on wide flights, narrow stairwells, and exterior concrete stairs are all common applications where a simple wall-mounted rail does the job.
The installation is more straightforward than a full baluster system, but the details matter. Bracket spacing, anchoring into framing, the return requirement at each end, and profile selection for graspability all need to be handled correctly to pass inspection and hold up under real use.
When a Wall-Mounted Handrail Is the Right Choice
Basement stairs: Basement stairwells are often too narrow for a full railing system on both sides. A wall-mounted handrail on one or both sides meets code with minimal intrusion into the usable stair width.
Second-side handrails: Stairs wider than 44" typically require handrails on both sides. If one side already has a baluster-and-newel system, the opposite side often uses a wall-mounted rail as the second-side graspable element.
Narrow or enclosed stairwells: Where there is no room for a newel post and baluster assembly, the wall-mounted option provides the required graspable surface without consuming floor space.
Exterior concrete or masonry stairs: When stairs attach to a foundation wall or concrete block, anchoring brackets directly into the masonry is usually simpler and more structurally sound than installing newel posts on the concrete surface.
Rental properties and code retrofits: Adding a graspable rail to an existing staircase with a non-compliant decorative cap rail is the most common retrofit scenario. A wall-mounted round rail installed at the correct height resolves the compliance issue without touching the existing railing system. Check whether your project needs a permit before you start.
[IMAGE: Side-by-side showing basement stair with wall-mounted handrail on both sides vs. an open stair with wall-mounted rail on the wall side and a baluster system on the open side]
Bracket Types
Two types of brackets are used for wall-mounted handrail installation:
Wall Brackets
A wall bracket mounts flat to the wall surface and supports the underside of the handrail with an arm that extends perpendicular to the wall. The rail rests in a saddle or cradle on the end of the arm and is secured either with a screw from below or with a strap/collar that wraps the rail.
Wall brackets come in multiple arm-length options — typically 2" to 4" — which determines how far the rail stands off the wall. The minimum clearance between the rail and the wall must be at least 1.5" per most codes (IRC R311.7.8.4), so that a hand gripping the rail can slide freely without knuckles hitting the wall.
Wall brackets are the standard choice for most wall-mounted installations. They're available in raw steel (for painting), black powder coat, satin nickel, oil-rubbed bronze, and other finishes to match the hardware in the space.
[IMAGE: Wall bracket installed on drywall, showing arm extension and rail saddle with rail resting in it]
Return Brackets
A return bracket is a specialized bracket used at the top and bottom ends of the rail run. It terminates the rail by turning it back toward the wall rather than allowing it to project into the travel path.
This is both a code requirement and a practical safety measure — a projecting rail end is a snag point for sleeves, bags, and in the worst case, a person who stumbles. The return bracket holds the rail in the turned position so the end cap meets the wall surface cleanly.
[IMAGE: Return bracket at the bottom end of a staircase, showing the rail curving back to meet the wall surface]
Some rail installations use a wall return fitting instead of a dedicated return bracket: the rail is cut and the end is fitted with a curved wood or metal piece that sweeps back to the wall, then the whole assembly is mounted on standard wall brackets. Either approach is acceptable — what matters is that the rail end doesn't project.
Bracket Spacing
The IRC does not specify a maximum bracket spacing for wall-mounted handrails, but the practical and structural standard is 48 inches on center maximum, with most installers targeting 36"–48" on center for residential applications.
Closer spacing is better on long runs, in high-traffic locations, and when using heavier wood profiles. A rail that spans more than 48" between brackets will flex noticeably under load — not a structural failure, but a disconcerting movement that undermines confidence in the installation.
Practical spacing approach: - Install one bracket within 12"–18" of each end of the rail - Space remaining brackets evenly between the end brackets at no more than 48" intervals - On a typical 12-foot staircase run, three to four brackets is usually appropriate
[IMAGE: Elevation diagram of a wall-mounted handrail showing bracket positions at consistent intervals, with the first and last bracket near each rail end]
Finding Studs and Anchoring Into Framing
A wall-mounted handrail is only as strong as its fasteners. The rail will be grabbed, leaned on, and loaded in every direction. Anchoring into framing is not optional — it's required.
Anchoring into Wood Framing (Standard Drywall Walls)
Use an electronic stud finder to locate studs along the wall. Mark each stud center with a light pencil mark.
Studs in residential construction are typically spaced 16" or 24" on center. If they don't align perfectly with your desired bracket spacing, adjust bracket positions to fall on studs — don't compromise the fastener by going into drywall alone.
Drive lag screws or structural wood screws (minimum 3" long to achieve 1.5" penetration into the stud through 1/2" drywall) through the bracket mounting plate into the stud.
Use two screws per bracket plate — a single screw allows the bracket to rotate under load.
[CALLOUT-TIP: If you're having difficulty finding studs, drill a small test hole at an angle behind where the bracket will cover it, and probe with a bent wire to feel for solid wood. Electronic stud finders can produce false readings near wiring and plumbing.]
When Studs Don't Line Up
Sometimes the ideal bracket position doesn't fall on a stud. Options:
Toggle bolts: Snap toggles and FlipToggle-style anchors rated for the required load can anchor into drywall when studs aren't available. Verify the rated load of the anchor against the expected load on the bracket. Shear loads (downward force) are what matter for handrail brackets — check the manufacturer's shear rating specifically, not just the pullout rating.
Backing plate: The most reliable solution is to install a horizontal backing plate (a 2×6 or similar) horizontally in the wall between two studs before drywalling. If you're doing a full stair renovation and the walls are open, always add blocking at handrail height.
Horizontal blocking: If the wall is already finished, a surface-mounted horizontal board at handrail height (painted or stained to complement the space) can act as a backer that the brackets screw through — as long as the board itself is anchored to studs at each end.
Anchoring Into Concrete or Masonry
Use concrete anchors — Tapcon-style screws or wedge anchors — sized appropriately for the bracket mounting hole pattern. Pre-drill with a hammer drill and masonry bit. Anchor into the mortar or block face (not mortar joints in block, which are weaker). Confirm anchor pull-out strength meets or exceeds the bracket manufacturer's minimum.
[IMAGE: Installer using a hammer drill to pre-drill a masonry anchor hole for a bracket mounted to a concrete foundation wall]
Height Requirements
The IRC requires handrail height of 34" to 38" measured vertically from the tread nosing to the top of the handrail. This range applies to the raked (angled) portion of the stair.
On the level landing above or below the stair, handrail height for guard rails is 36" minimum, but the handrail element specifically should maintain continuity with the stair rail height.
To set height on a wall-mounted installation: 1. Hold a long level (or a straight board) against the wall at the rake angle of the stair, with one end touching the nosing of the lowest tread. 2. Measure 36" (or your target height within the 34"–38" range) up from the nosing along the vertical. 3. Mark the wall at that point — this is where the top of the rail should be at the bottom of the flight. 4. Use a chalk line angled at the rake angle of the stair to mark the bracket installation line on the wall. 5. Install brackets so the top of the rail follows this line precisely.
Return Requirements at Top and Bottom
Code requires that handrail ends either return to the wall, post, or newel, or terminate in a post cap or newel. A free-projecting end — one that sticks out into space with nothing to stop it — is a code violation under most jurisdictions.
At the bottom of the flight: The rail should extend to a point directly above the bottom riser (or beyond, if transitioning to a level section), then return toward the wall. The return can be accomplished with a curved wood fitting, a metal return fitting, a return bracket, or by continuing the level rail to the wall and mounting a wall bracket at the end.
At the top of the flight: The rail continues past the top riser and the return sweeps back to meet the wall. Alternatively, the rail can continue as a level section along the landing wall, provided the height transitions to the appropriate landing guard height.
[CALLOUT-WARN: Skipping the return at the bottom of the flight is one of the most common reasons a wall-mounted handrail fails inspection. The projecting end must terminate cleanly — don't leave a sharp, exposed rail end at grab height in a traffic path.]
Profile Selection for Graspability
Because wall-mounted rails almost always act as the sole handrail element, the profile must be graspable under IRC R311.7.8. This means:
Round profiles 1.25"–2" diameter are ideal — they're Type I graspable and universally available
Oval or slightly non-circular profiles within the 4"–6.25" perimeter range also qualify as Type I
Large decorative profiles may need a conforming finger recess to qualify as Type II
For most wall-mounted applications, a simple 1.5" or 1.75" round profile in a matching wood species is the correct choice. It's clean, graspable, easy to source, and passes inspection without question.
See Graspable Handrail Code for a full breakdown of Type I vs. Type II and which profiles qualify.
Ready to add a wall-mounted handrail to your staircase? StairSupplies stocks brackets, round rail profiles, and return fittings that make the installation clean and code-compliant from the start. [CTA BUTTON: Shop Handrails]
Internal links:
Keep reading
All resources- How-ToInstallationHow to Install Iron Balusters: A Complete Step-by-Step GuideLearn how to install iron balusters step by step — measuring, cutting, drilling, epoxy setting, and code-compliant spacing — for treads, balconies, and knee walls.9 min read
 GuideInstallationProduction Team Member Earns CertificationStudy, Skill, and Certification Graham Morris, a member of StairSupplies’ cable railing production team, recently received ⅜” GMAW, or Gas Metal Arc3 min read
 GuideInstallationUse Horizontal Railing To Modernize Your HomeHorizontal Railing—Rod and Cable Railing Systems With fluid, parallel lines, horizontal railing is the hottest trend in stair and deck railing systems.3 min read