


How To Replace Baseboard Trim
 Baseboard trim adds a subtle touch of a style to a room’s decor. Whether it’s the living room, kitchen, bedroom, office, bathroom or practically anywhere else inside the home, installing trim around the baseboards creates a more stylish and modern appearance.
Over time, however, the trim may begin to show signs of wear and damage. It’s not uncommon for family members to accidentally knock small dents into them when moving furniture or other objects. Thankfully, you can replace old, damaged or worn baseboard trim in just a few simple steps.
Step #1) Remove The Old Baseboard Trim
First and foremost, you’ll need to remove the old trim surrounding your baseboards. Start by running a utility knife around the top, pressing down just enough so the blade separates the trim from the wall. This isn’t going to completely detach the trim, so don’t worry if it’s not coming off. The purpose of doing this is to simply provide enough room to pull the trim away.
Once you’ve finished outlining the top of the trim with a utility knife, you can begin to remove it with a putty scraper. Press the putty scraper down in between the trim and wall to give you a little working room, and then use a prybar to peel it off. Continue doing this until you’ve removed each and every section you wish to replace.
Step #2) Prep The Area
With the old baseboard trim removed, you can now prep the area. If you haven’t done so already, go ahead and measure the area where you want to install the trim. It’s a good idea to purchase slightly more trim than what your measurements call for just in case you make a mistake.
Prepare the baseboard area by sanding it with medium-grit sandpaper, followed by an application of primer or sealer. You don’t have to wear it down until it’s silky smooth, but instead sand it just enough to create an even surface with no visible imperfections. Taking these extra steps will prolong the life of your trim by creating a more solid and secure surface.
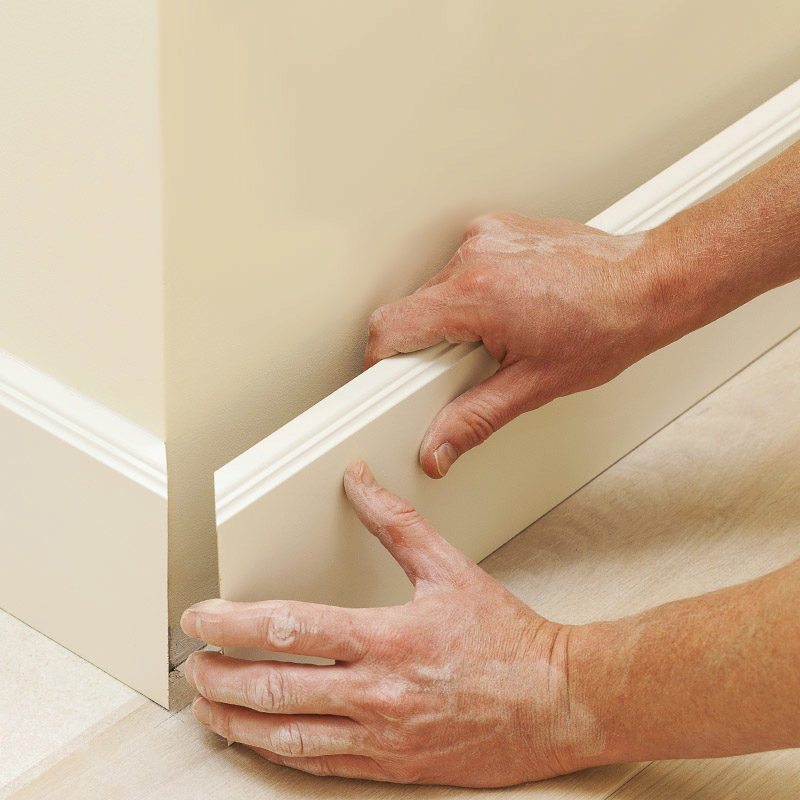
Step #3) Install New Baseboard Trim
You really have two different options when it comes to installing new baseboard trim in your home: gluing or nailing. Both of these options are pretty easy and straightforward, but many DIY homeowners prefer the simplicity of gluing. Simply line your baseboard trim in the appropriate position and glue each individual piece to the wall.
If you plan on nailing your baseboard trim, you must first locate the studs. Trim should only be nailed into the studs and not the drywall; otherwise, it may fall out later down the road. Modern-day homes are typically constructed with studs 16 inches on center. Using a stud finder or even a high-powered magnet will help you find their exact location.
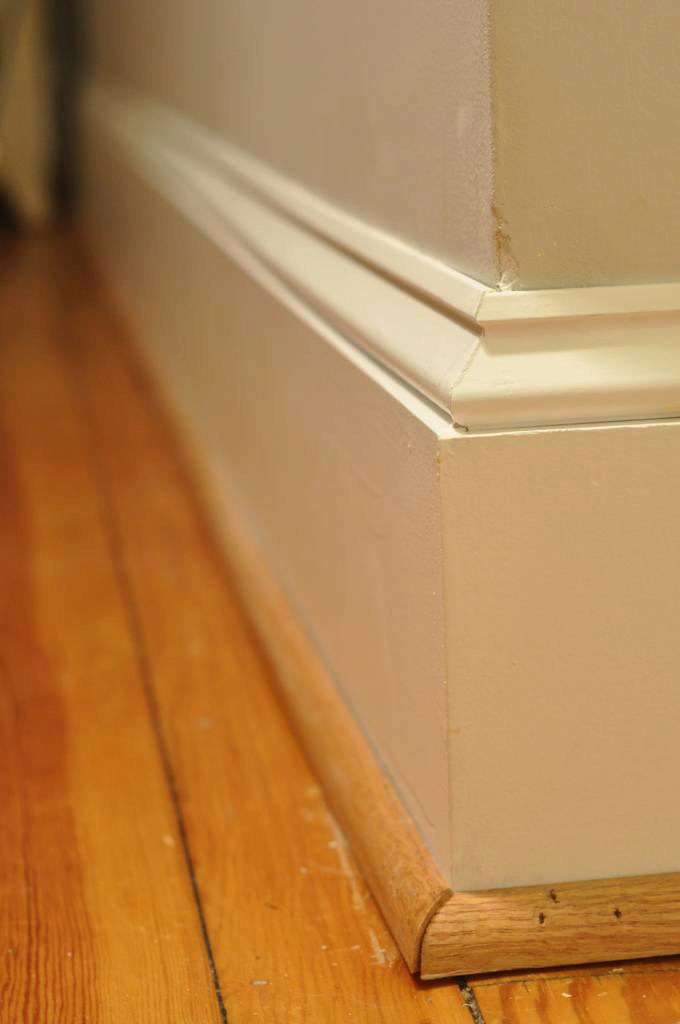
Once you’ve successfully installed the trim, you can go back over it with a coat of paint if desired.