


DIY Cable Deck Railing for a Wood Post Deck

Whether you’re an experienced handyman or a determined do-it-yourselfer, we believe that you’ll find Viewrail cable railing systems by StairSupplies™ to be a DIY-friendly cable railing solution. On this page, we have all the resources you need about cable railing systems to purchase and install a safe and elegant cable deck railing system for an exterior deck with wood posts.
Safety First
Let’s start by talking through some safety and code compliance details. The 4 inch Sphere Rule is a common standard telling us that a ball with a diameter of 4 inches shouldn’t fit between the cables. For this reason, we recommend a cable spacing of no more than 3 ⅛ inches.
Post spacing plays a crucial role in how much the cables will deflect as well as handrail strength. Cable deflection is simply how much you can move the cables after they are tensioned. For a deck with wood posts and handrail, structural posts should be no more than 8 feet apart. For the purpose of acceptable cable deflection, a post is needed every 4 feet. Intermediate Posts can be installed between structural posts to maintain acceptable cable deflection. Example: You have a deck with structural posts that are 6 feet apart. All you have to do is install an intermediate post between them, and now your cable span is only 3 feet. *Viewrail by Stair Supplies does not currently provide intermediate posts, we strongly suggest that you keep your post spacing to a maximum of 4 feet as much as possible. This provides the safest, strongest, system possible.
Make a Plan
Every successful cable railing installation starts with a sketch. You’ll want to make a rough sketch of your deck, complete with measurements. You will also want to know the handrail height. The info on this sketch will help you figure out exactly what you need to purchase and reduce any confusion about how the system comes together. Here’s a sample sketch:

The black squares are structural posts.
Intermediate Posts
When looking at this sample deck sketch, we can see right away that the structural posts are more than 4 feet apart. So we will need to add Intermediate Posts to the sketch. Stair Supplies offers one style of intermediate post: 3/16″ Stainless Steel(or Aluminum).

The diamonds are Intermediate Posts.
Now we have 6 intermediate posts added to the sample sketch. You can make a parts list on your sketch, or choose a style and add them to your cart.
Cable Tensioning Hardware
Now it’s time to discuss our cable mounting and tensioning components. These components are sold as Kits, with each Kit containing all the components you need to attach one end of a cable to a post. We will need to choose a style and figure out quantity. First, let’s look at the different styles: Standard, and DriveTite.
Standard Tension Kits
These components are made from marine-grade 316 Stainless Steel and can handle cable runs up to 60 feet long. Standard Tension Kits require holes to be drilled all the way through end posts. These fittings are attached to the cable with cable crimpers. Some customers feel that this style of tensioning is easier to re-tighten after initial installation. Wood Level Tension Kit is for level cable runs.

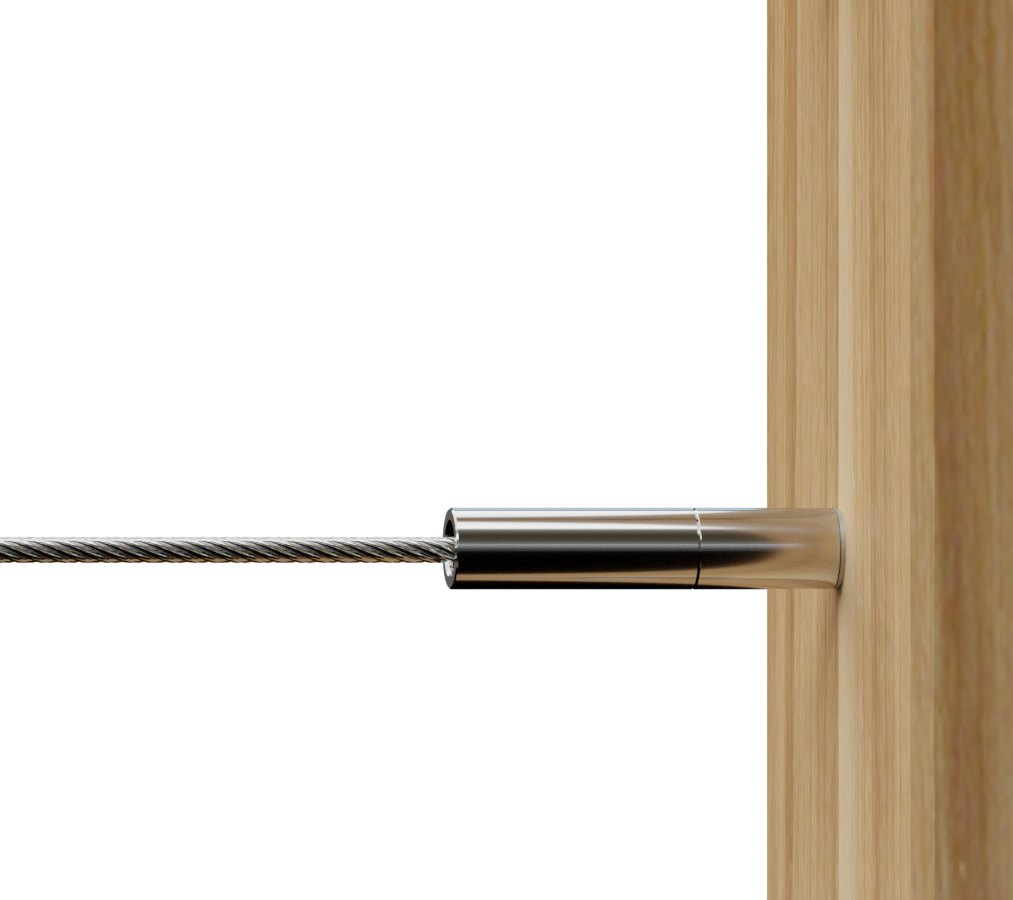
DriveTite Kits
The DriveTite Kits are made for an Angled or Leveled application. Mounting holes do not go all the way through the end posts, which creates a clean look that some customers have found preferable. Mounting and tightening are both achieved with one stainless steel screw.
Back to the sketch… I’ve just decided that our imaginary sample deck is going to use DriveTite Kits. We’ve added lines connecting each of the ‘end posts’ to represent cable runs and labeled them. We will need a Kit (per cable) at each end of each run. The stars represent locations where we will needs Kits.

Now that we know what the Kits are and where they go, we’ll figure out how many we need. This simple calculation will be based on the handrail height. To maintain a cable spacing of 3 ⅛ inches, a 36 inch handrail height requires 10 cables (39 inch needs 11 cables, 42 inch needs 12 cables, etc.), and 10 cables will require 20 Kits (one Kit on each end of the cable).
So for our sample deck, will need 60 Kits (six 10 packs). To review: 2 Kits per cable, 10 cables per run, 3 runs. If you’re following along with your own sketch, add your Kits to your parts list or right to your cart.
Helpful Tip: It’s a good idea to order a handful of extra parts, especially ones that get crimped (Threaded Crimp Fittings). Sometimes mistakes happen, and those parts aren’t reusable. You can return any leftover parts, but not damaged ones.
Insert Sleeves – Elegant and Optional
Now it’s time to decide if you want an optional component. Insert Sleeves are stainless steel rings that dress up the holes in your posts. Each Kit comes with an Insert Sleeve, so your end posts will already have them. If you want your pass-through wood posts to have the same look, you’ll need to add these to your parts list and/or cart.

As you can see on the sketch, we’ve added a small circle next to each side of the pass-through posts to indicate Insert Sleeves. Since we know that we have 10 cables passing through each of those posts, we’ll need 10 sleeves for each side of each post. In our sample deck, there are 3 pass-through posts so we’ll need 60 Wood Angle Inserts (because we chose DriveTite for our tensioning).
How Much Cable
No cable railing project is complete without the cable! Here’s how we like to figure out how much you’ll need.
For each cable run: length of run + 1 foot x the number of cables
The sample deck numbers look like this:
Cable Run #1 — 12ft. + 1ft. = 13ft. x 10 cables = 130ft.
Cable Run #2 — 18ft. + 1ft. = 19ft. x 10 cables = 190ft.
Cable Run #3 — 8ft. + 1 ft. = 9ft. x 10 cables = 90ft.
Total Cable Needed = 410ft.
Our 5/32 inch stainless steel cable is sold on 400 foot spools, and 100 foot spools. We normally suggest that you round up to be on the safe side (unopened spools of cable can be returned). So our sample deck will need a 400 foot spool and a 100 foot spool. Go ahead and add cable to your parts list and/or cart.
The Right Tools for the Job
All we need now are the right tools to make this job run smoothly. Stair Supplies offers a premium cable kit: the Cable Rail Installation Kit. The Cable Rail Installation Kit is the perfect set of tools to install any Viewrail by Stair Supplies cablerail system that requires crimping.
Other tools not included in our tool kits that we find helpful:
Cordless or Corded Drill
Level
Hammer
Forstner-style Drill Bit (DriveTite only)
You’re Ready to Order
At this point, you should have everything you need to install and enjoy a Viewrail by Stair Supplies cable railing system! Your order will come with installation instructions that carefully guide you through the rest of the process. There are also videos online to illustrate how each of the Kits are installed.
Still need help?
If you’re not totally comfortable that you’ve picked the right parts, please fill out our Cable Railing Quotation Form, and someone will be happy to assist you!